
English (EN)
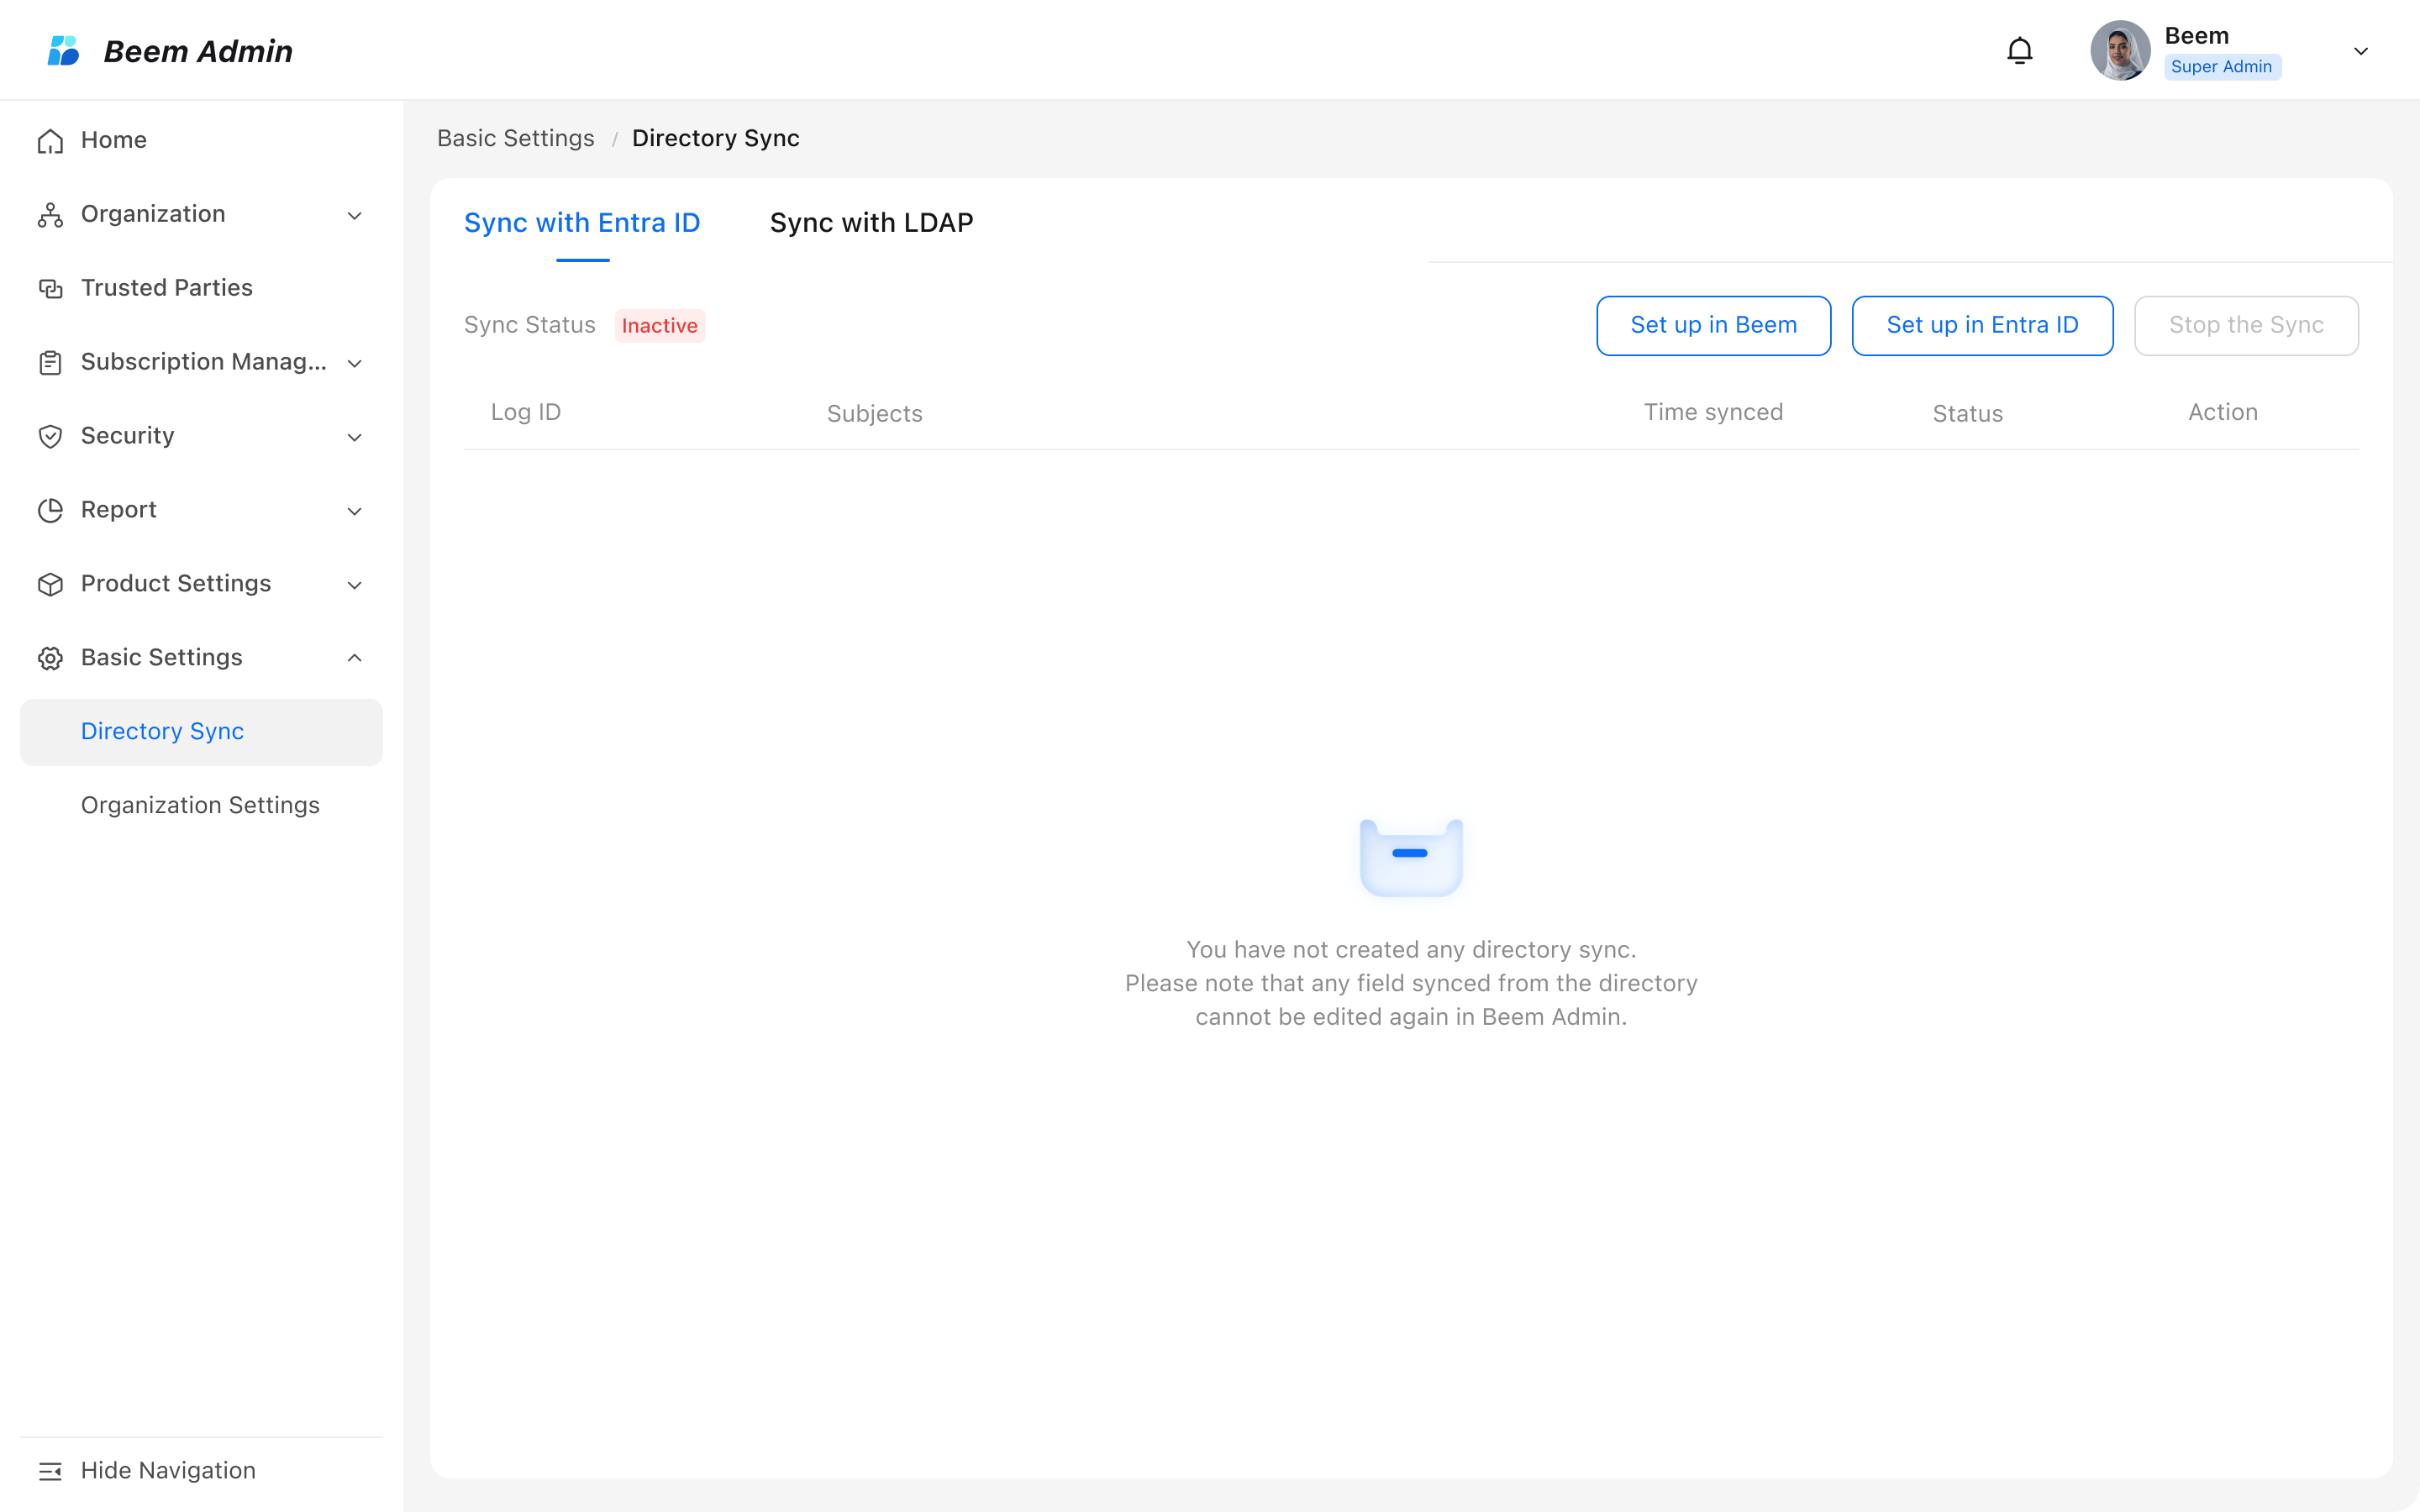
العربيةWith Directory Sync enabled, administrators can perform the following actions:
WARNING
Note: If a member is removed or leaves the organization and later returns, reactivating their account in Entra ID will treat them as a new user in Beem.
Ensure each user’s phone number in Entra ID includes the country code using the format (+966512345678). Otherwise, the number may not be recognized during sync.
Before deleting any member, make sure all their resources have been manually reassigned to another member to prevent data loss.
If any data in Beem is modified while sync is disabled, enabling sync may result in:
If users already exist in Beem before enabling sync, the selected identification method must match how those users were originally created as shown below:
WARNING
Note: The Entra ID user interface and the instructions provided within this article are intended solely for reference. Actual implementation steps may vary according to the platform in use or any updates made to the system.
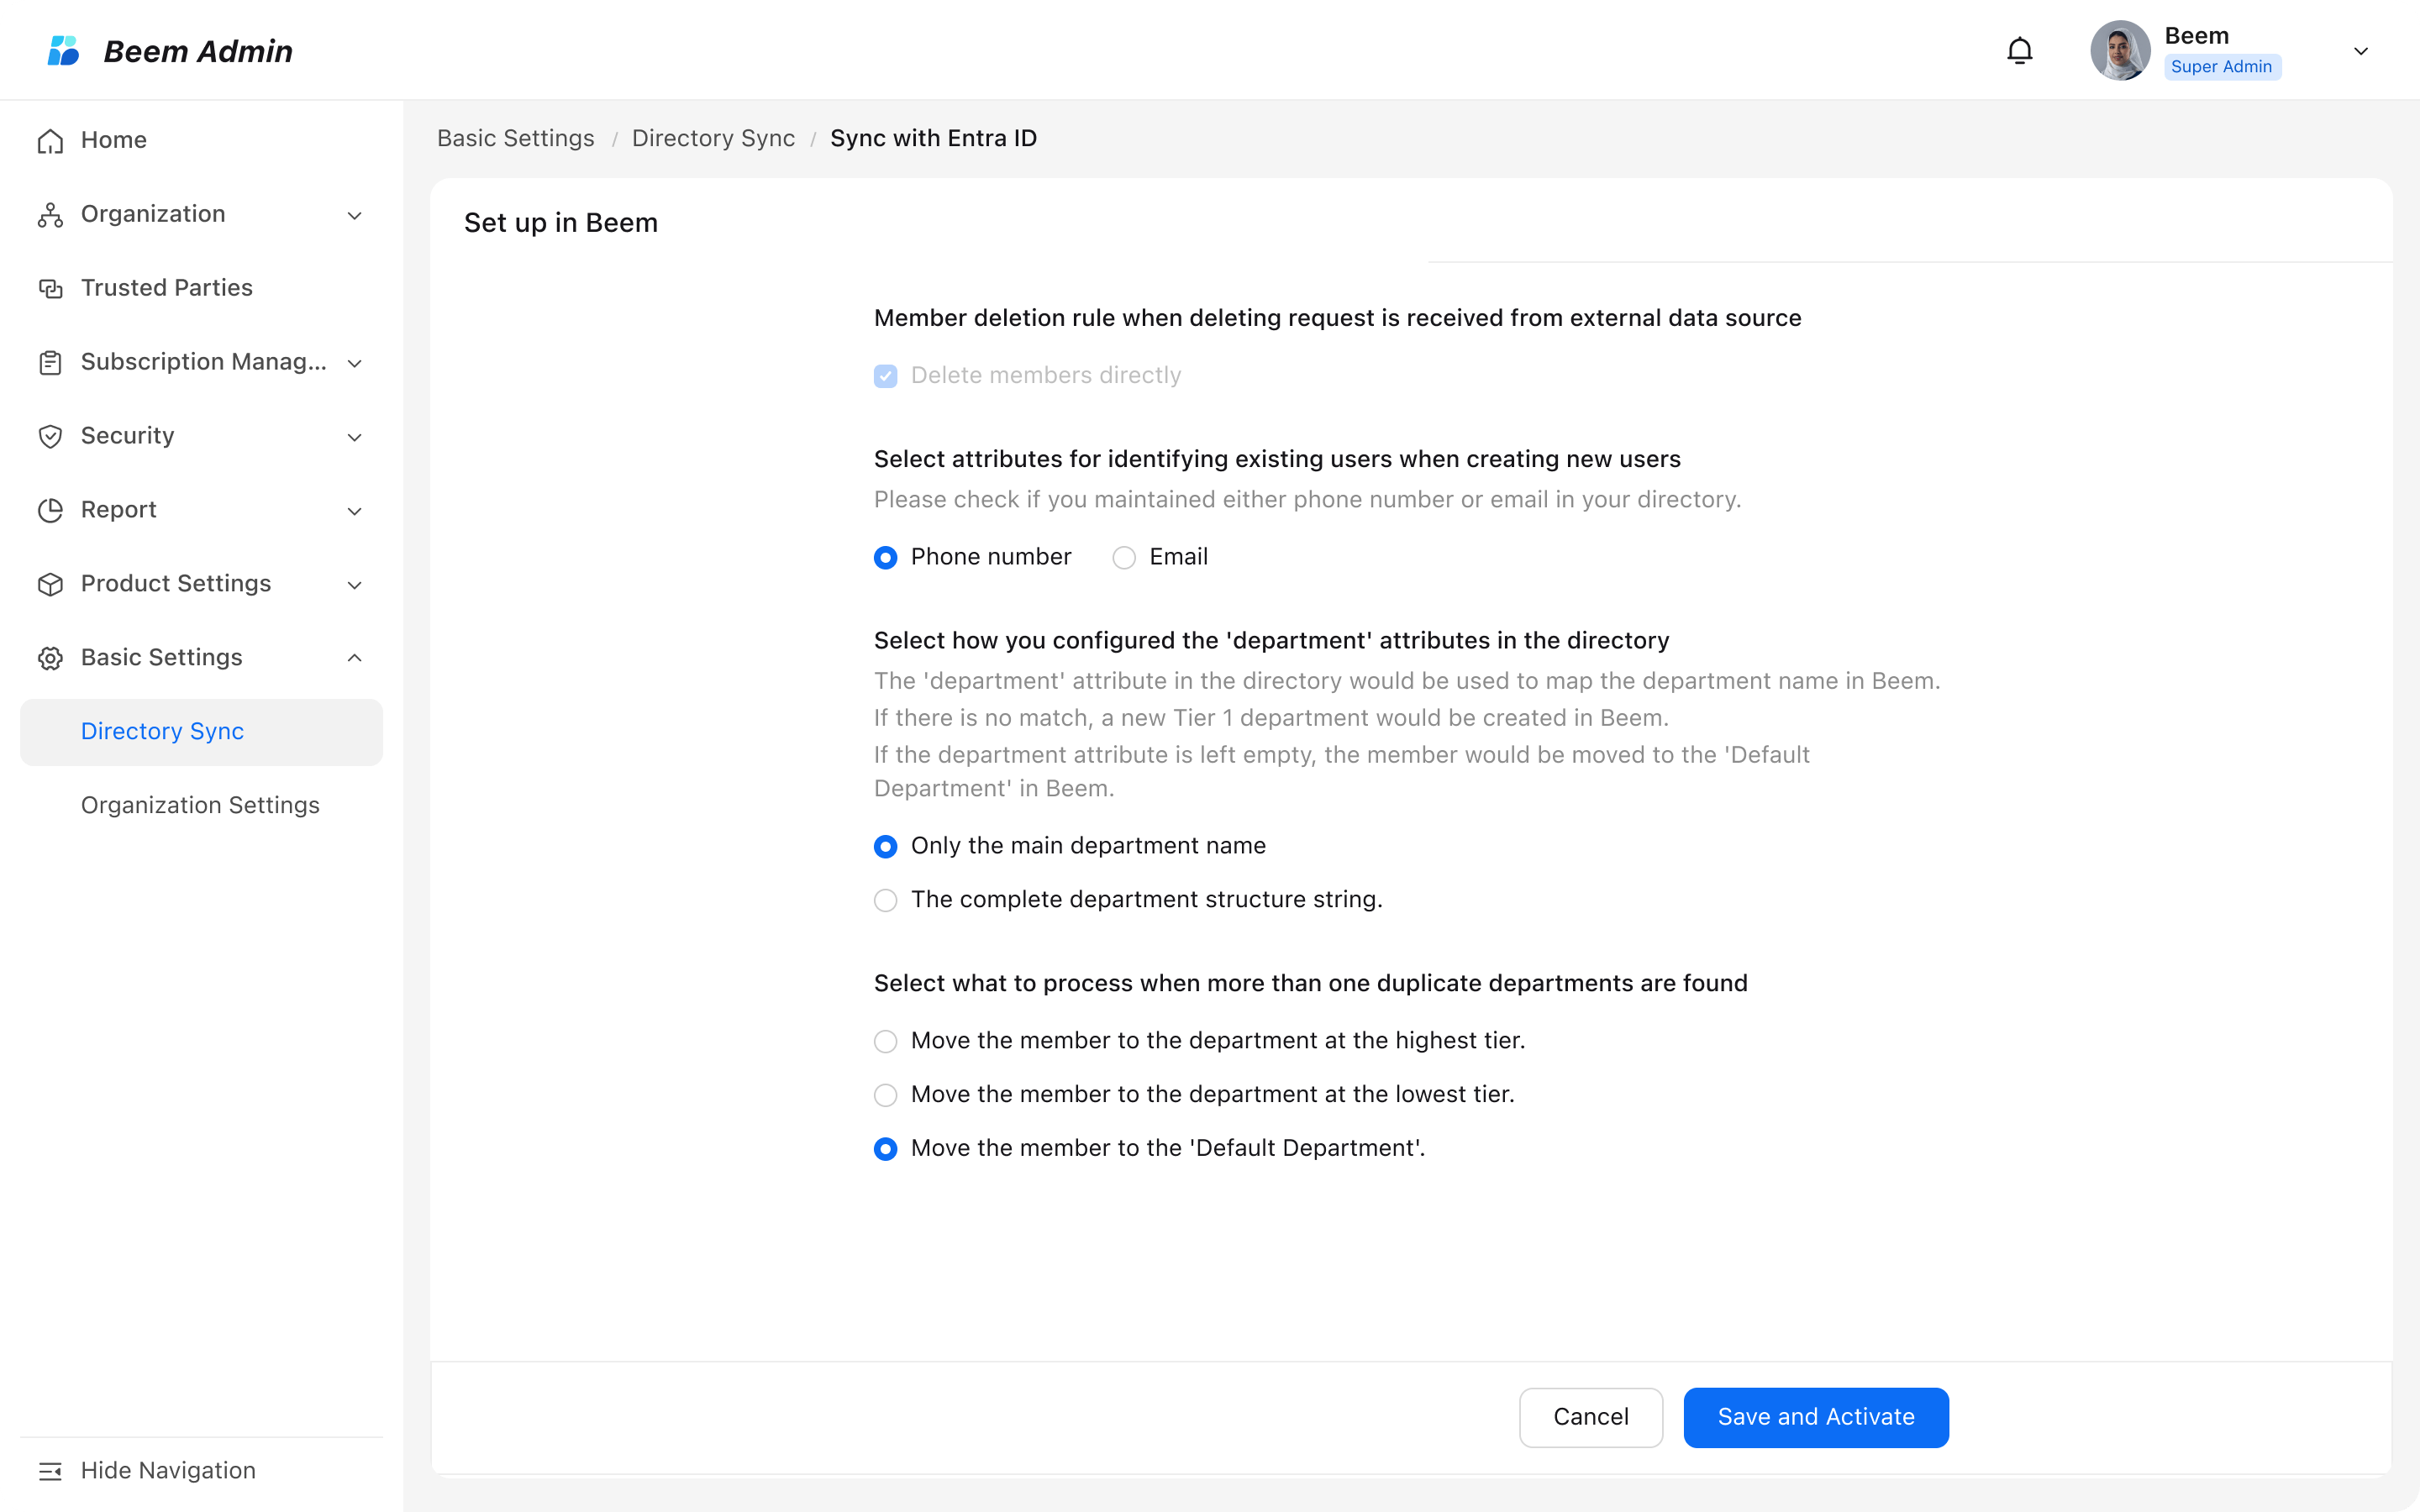
Member deletion rule: "Delete members directly" is set as the default option in this version.
Select attributes for identifying existing users when creating new users: Choose either phone number or email address as the attribute to identify existing users when creating new users.
WARNING
Note: The Email Login feature is only available in versions 3.10.0 and above.
Select how you configured the 'department' attributes in the directory: If you maintain a complete department structure string in your directory, Beem Admin will automatically set the department display on user profiles to "Current department only" to avoid redundant names.
Select what to process when more than one duplicate departments are found: 'Sync with Entra ID' maps department attribute names from Entra ID to department names in Beem Admin. If multiple duplicate departments exist for a member, you can specify the target department for the member (this can be modified later).


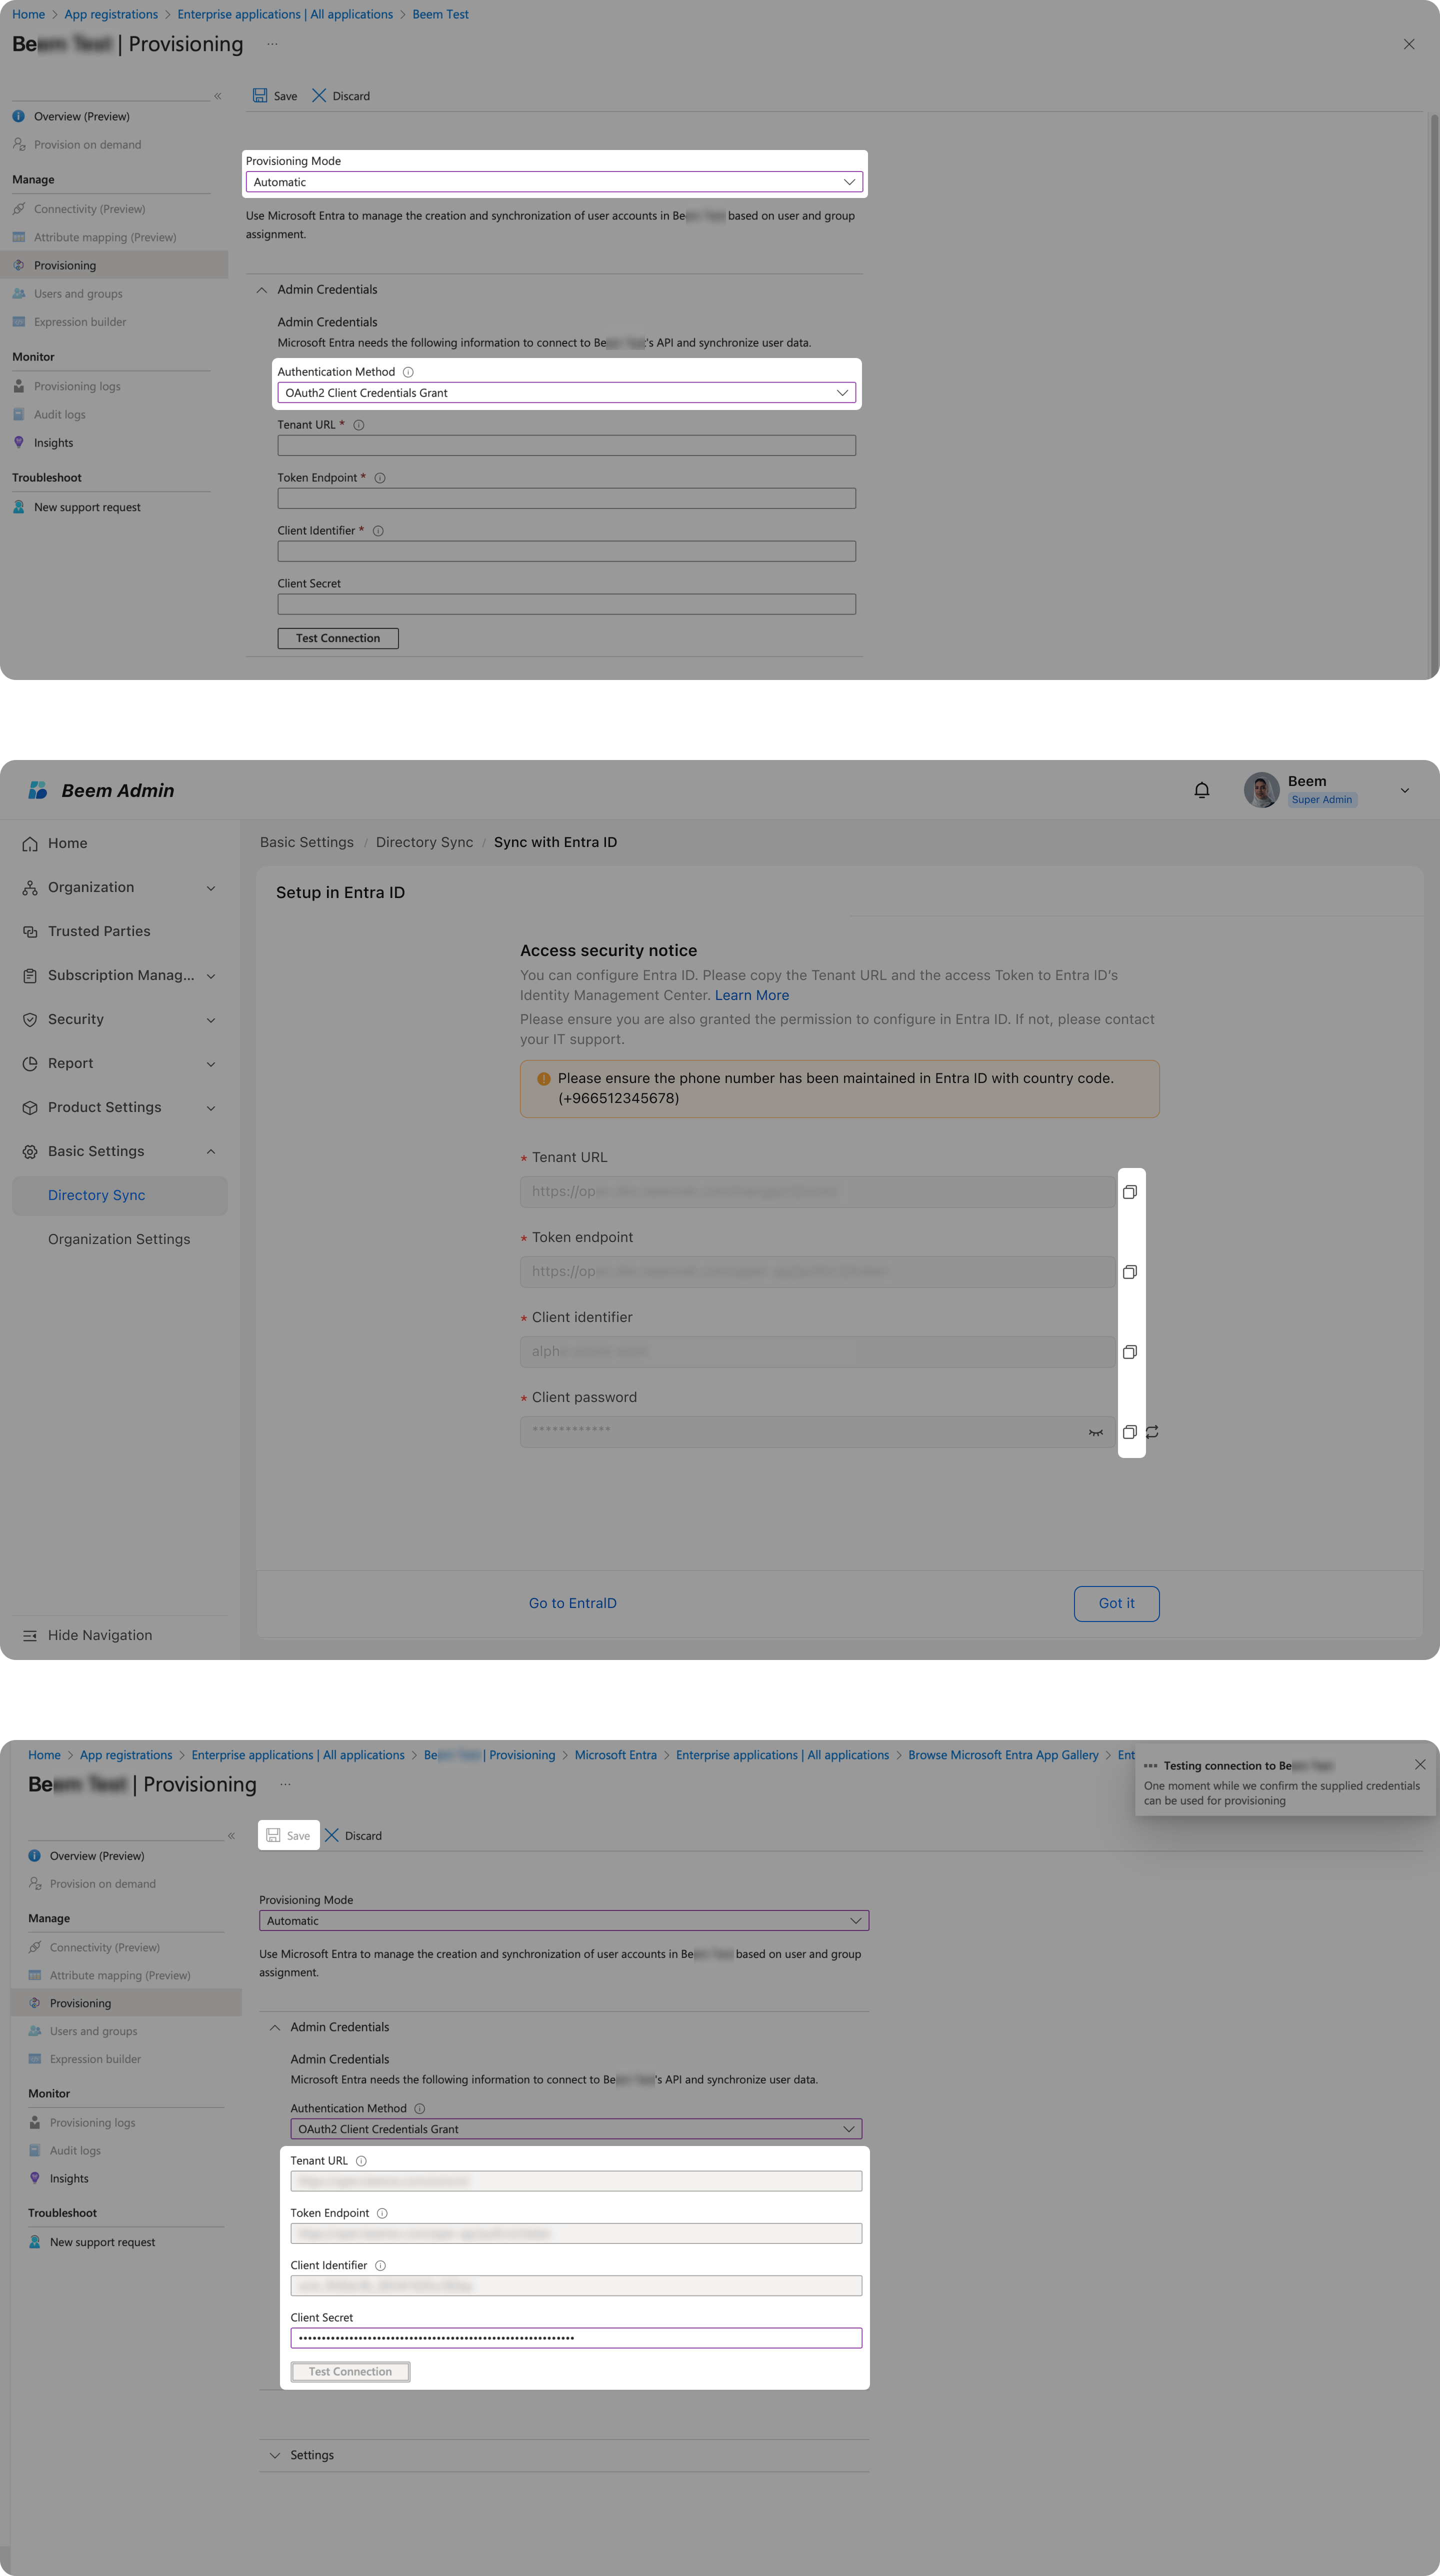
Select provisioning mode as Automatic. Regarding the Admin Credentials
Select the authentication methods as OAuths Client Credentials Grant.
Back to Beem Admin Suite - Sync from Entra ID - Configure Security Access. Copy the information back to Entra ID. -Tenant URL
Once the configuration is done, click on Test Connection to ensure the credentials are verified.
Click on Save
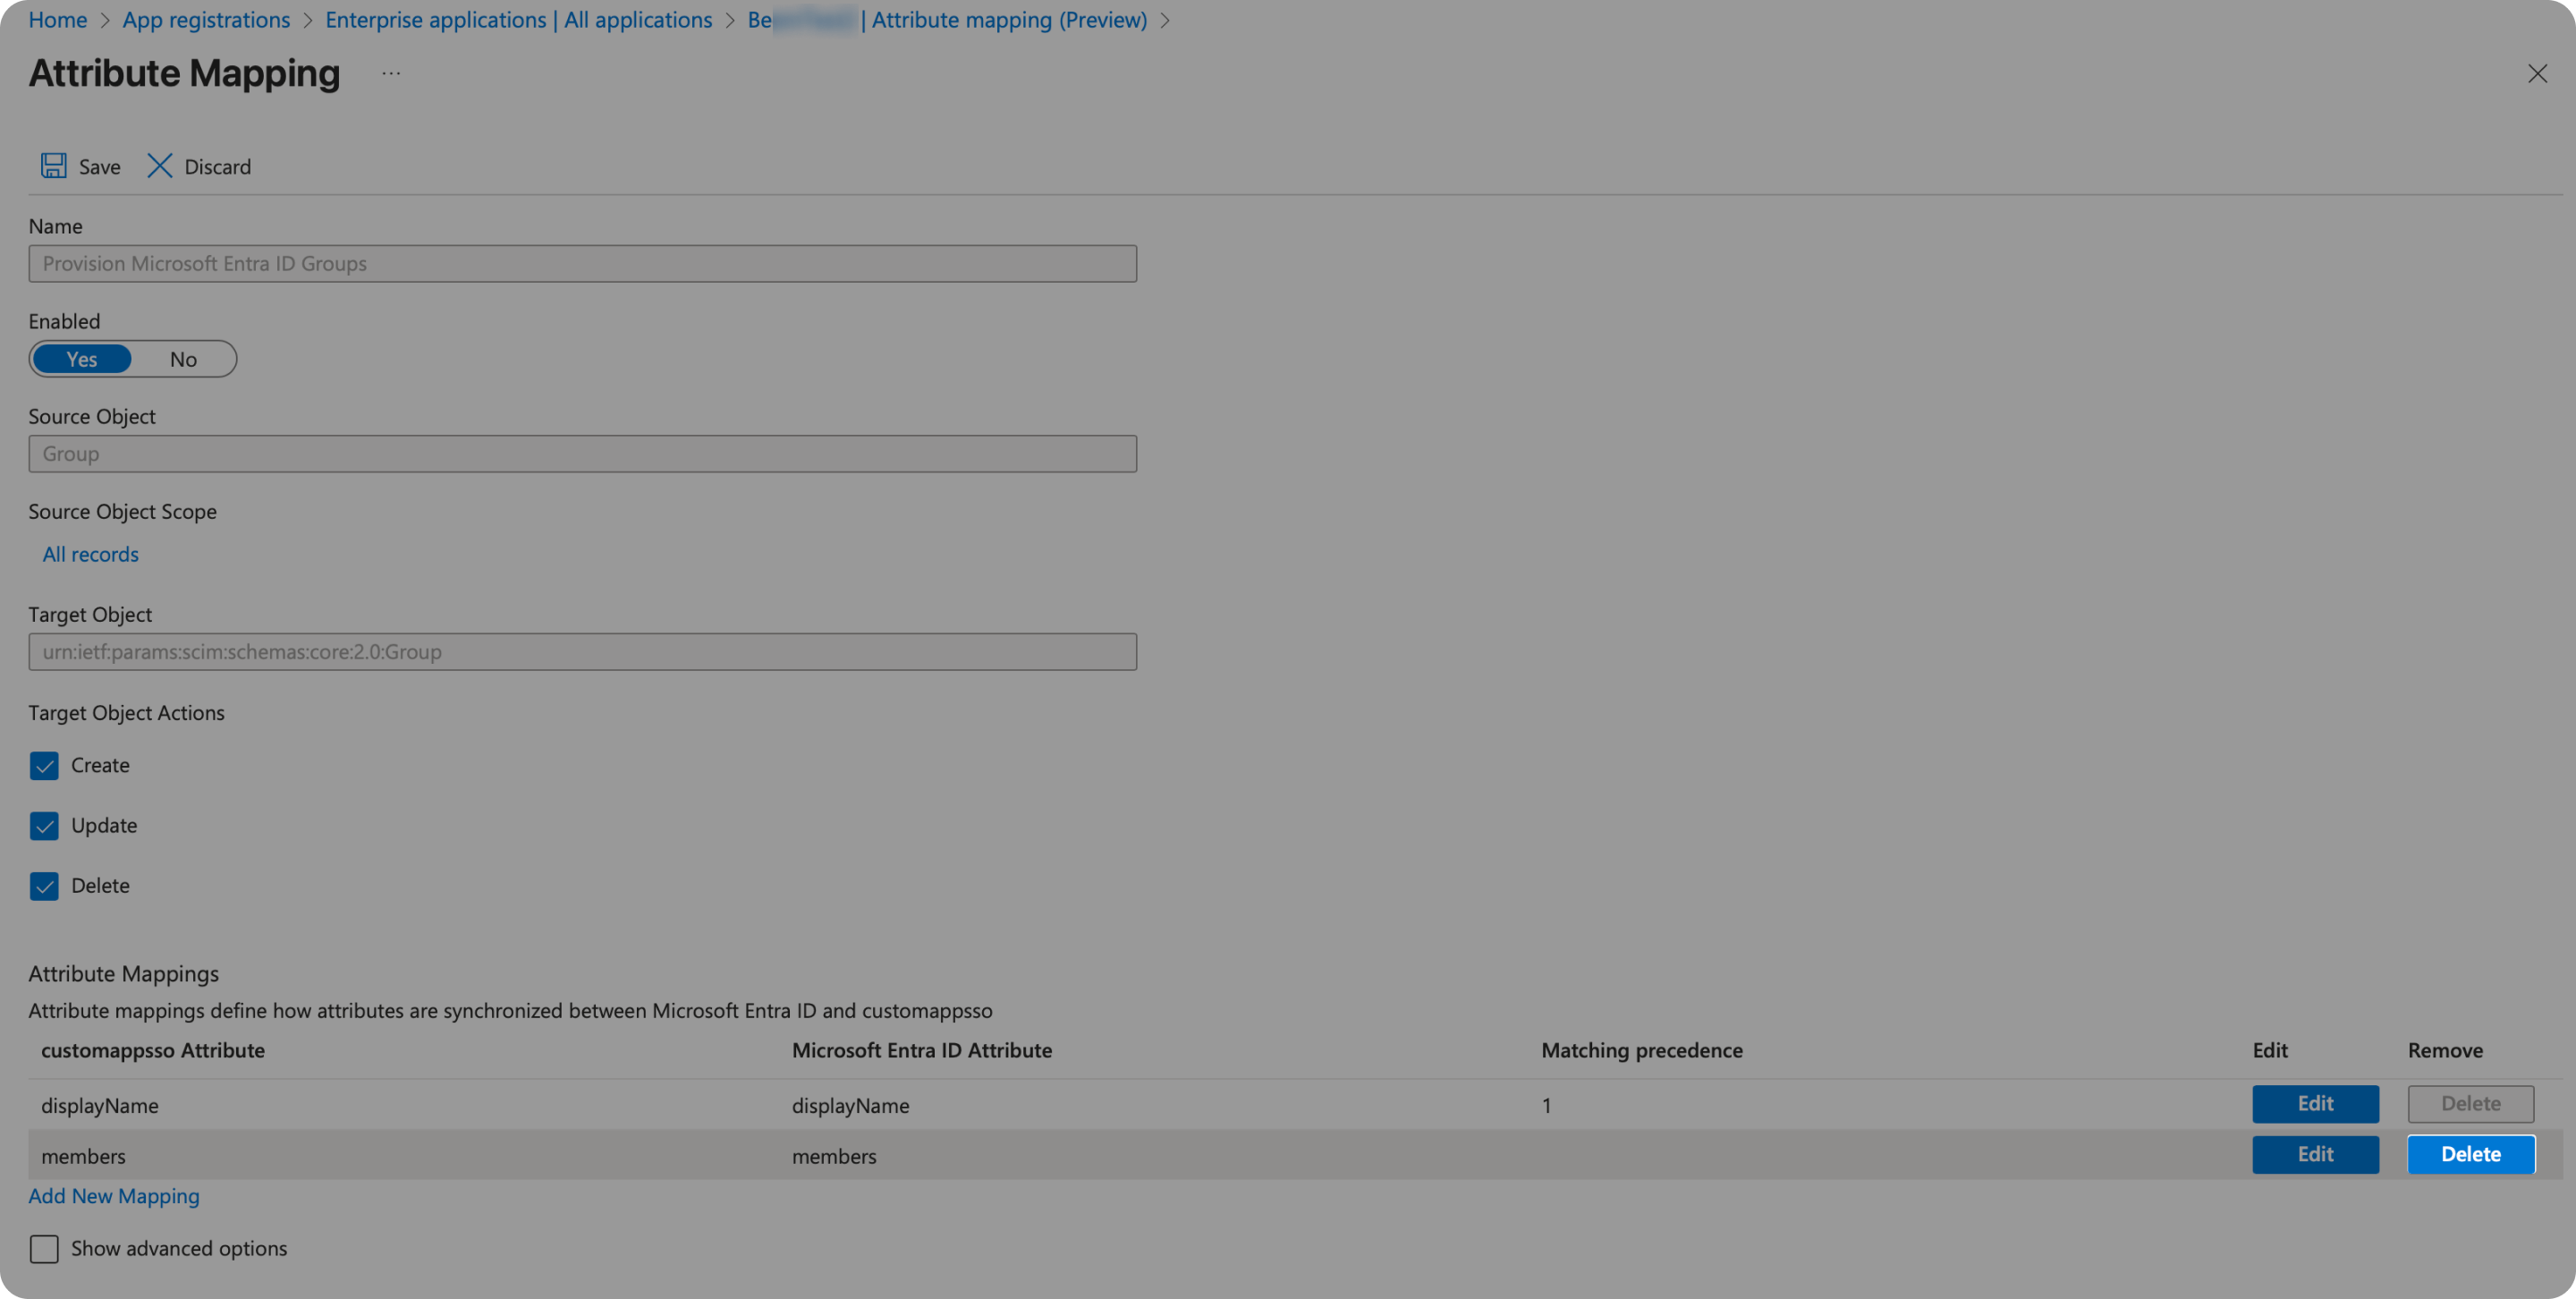
| Customappsso Attribute | Microsoft Entra ID Attribute |
|---|---|
| displayName | displayName |
| members | members |
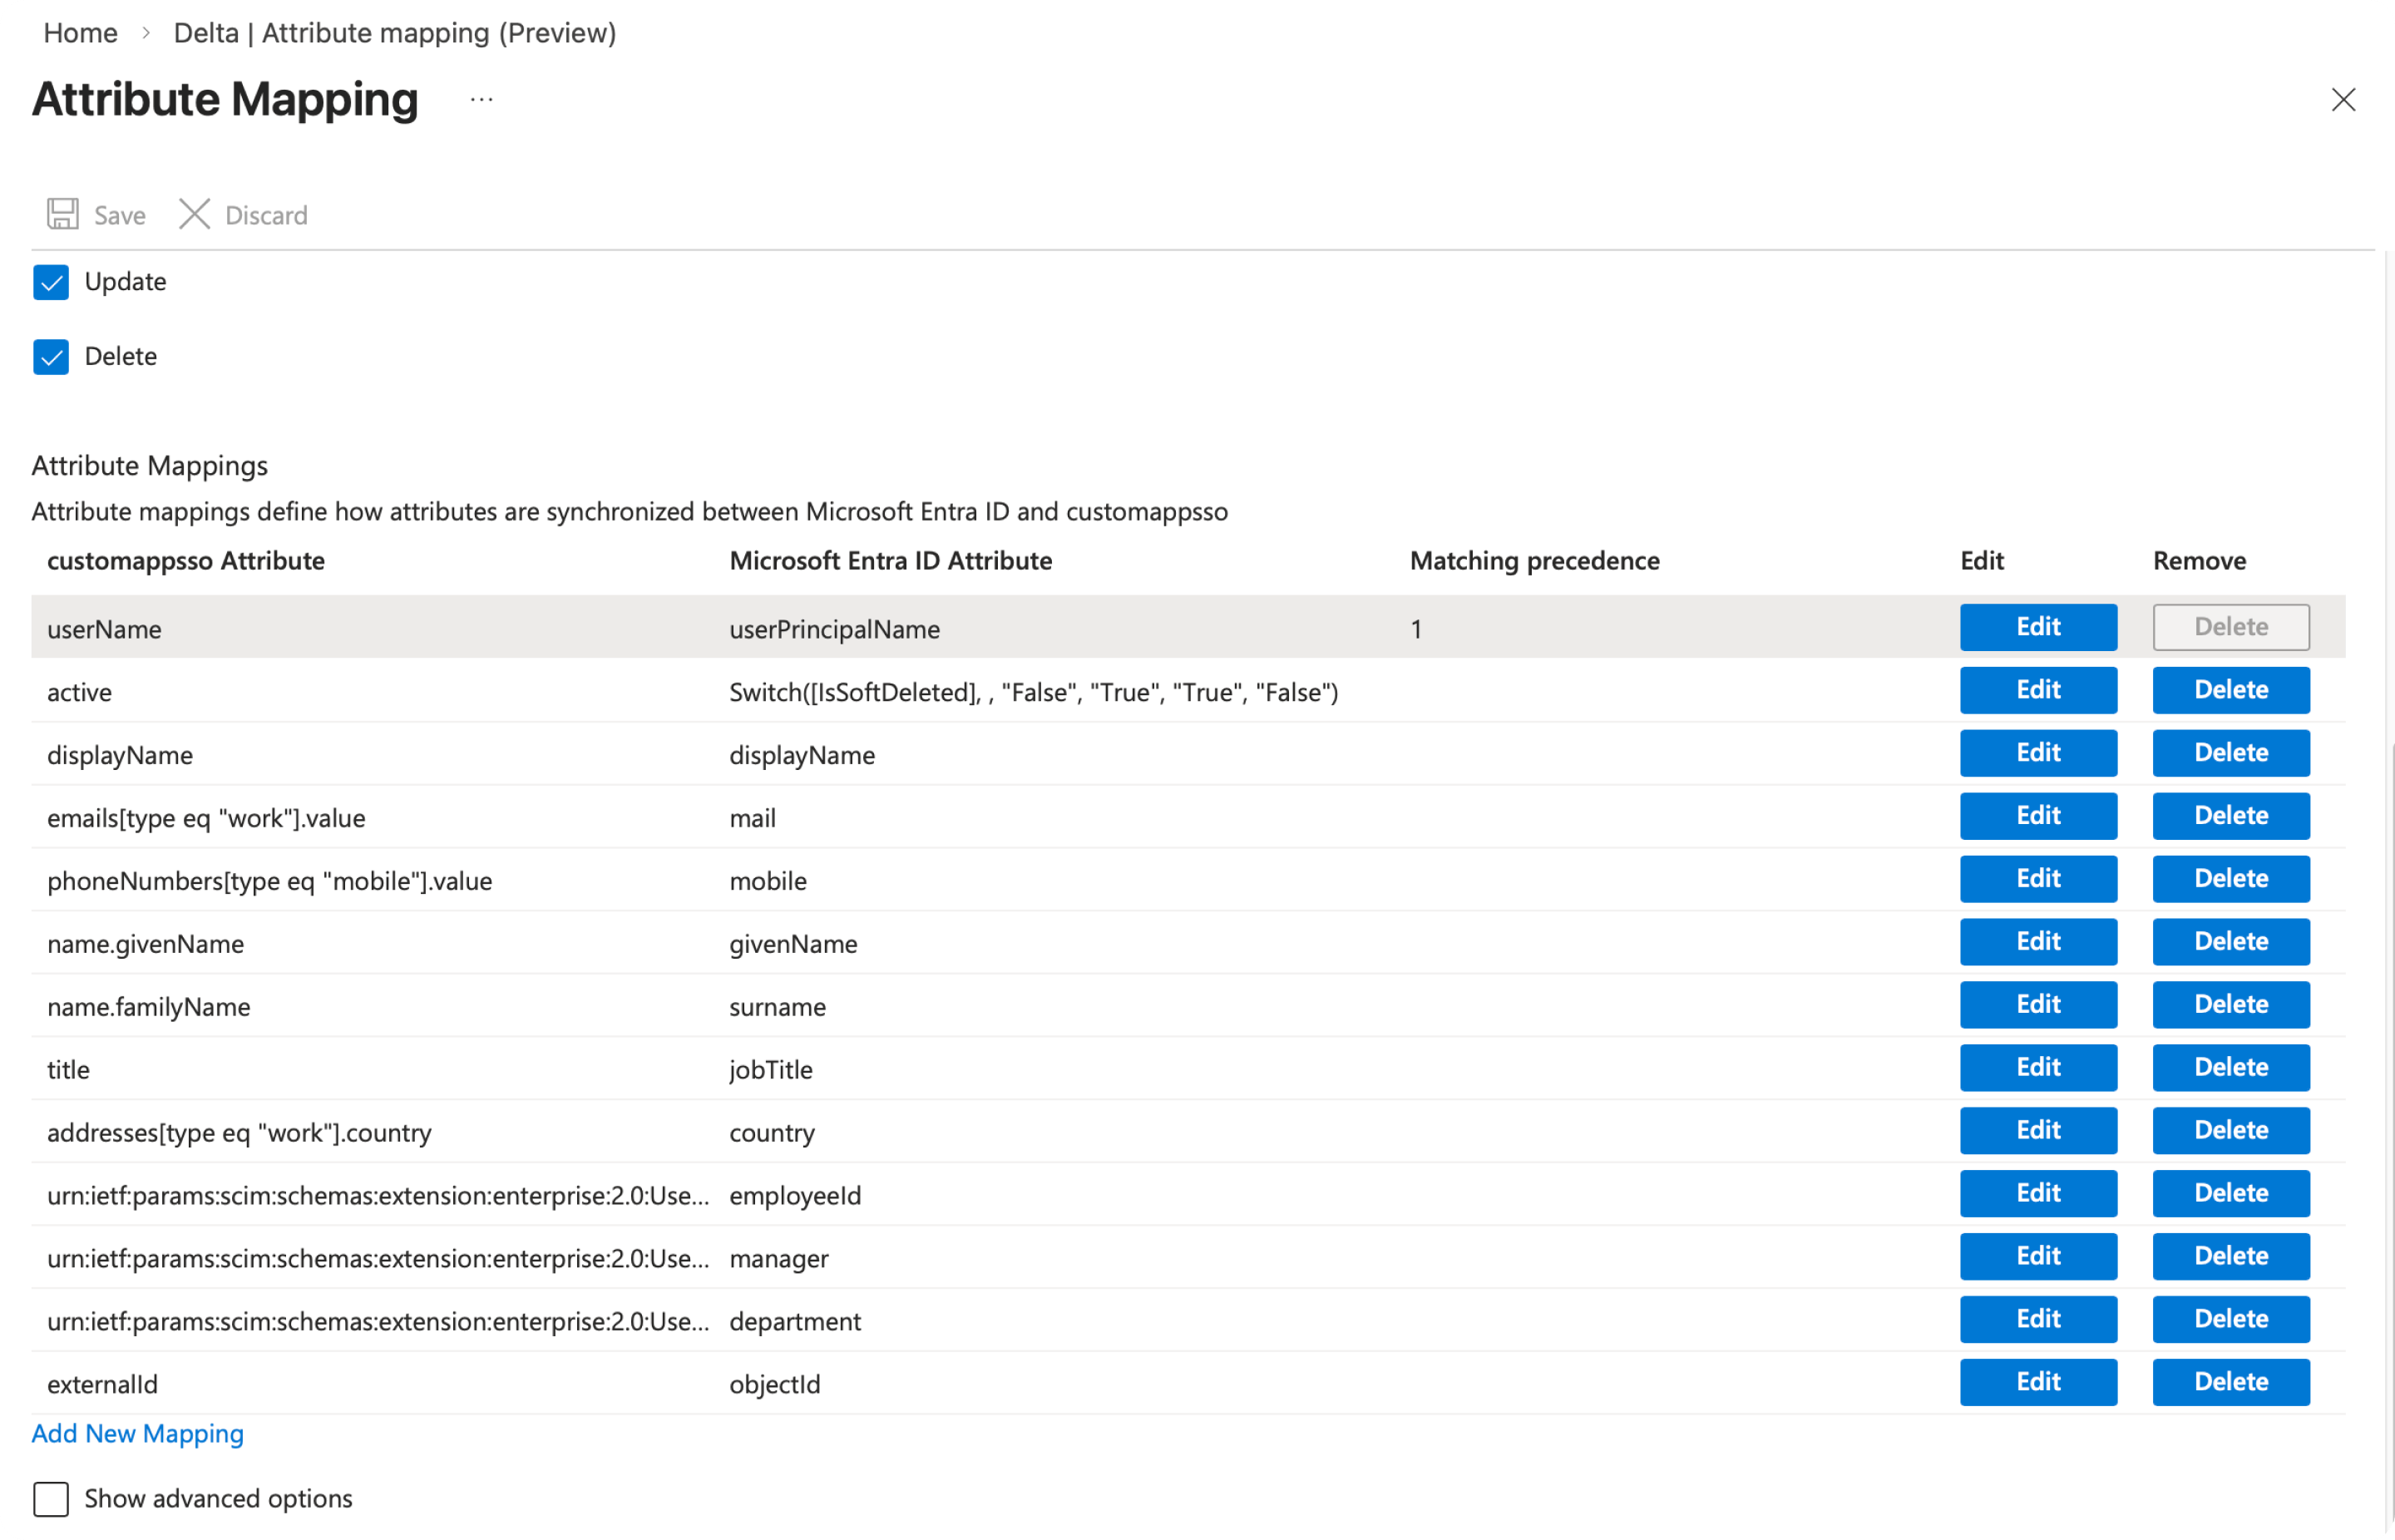
| Customappsso Attribute | Microsoft Entra ID Attribute |
|---|---|
| userName | userPrincipalName |
| active | Switch([IsSoftDeleted], ,"False", "True", "True", "False") |
| displayName | displayName |
| emails[type eq "work"].value | |
| phoneNumbers[type eq "mobile"].value | mobile |
| name.givenName | givenName |
| name.familyName | surname |
| title | jobTitle |
| addresses[type eq "work"].country | country |
| urn:ietf:params:scim:schemas:extension:enterprise:2.0:User:employeeNumber | employeeid |
| urn:ietf:params:scim:schemas:extension:enterprise:2.0:User:manager | manager |
| urn:ietf:params:scim:schemas:extension:enterprise:2.0:User:department | department |
| externalid | objectid |
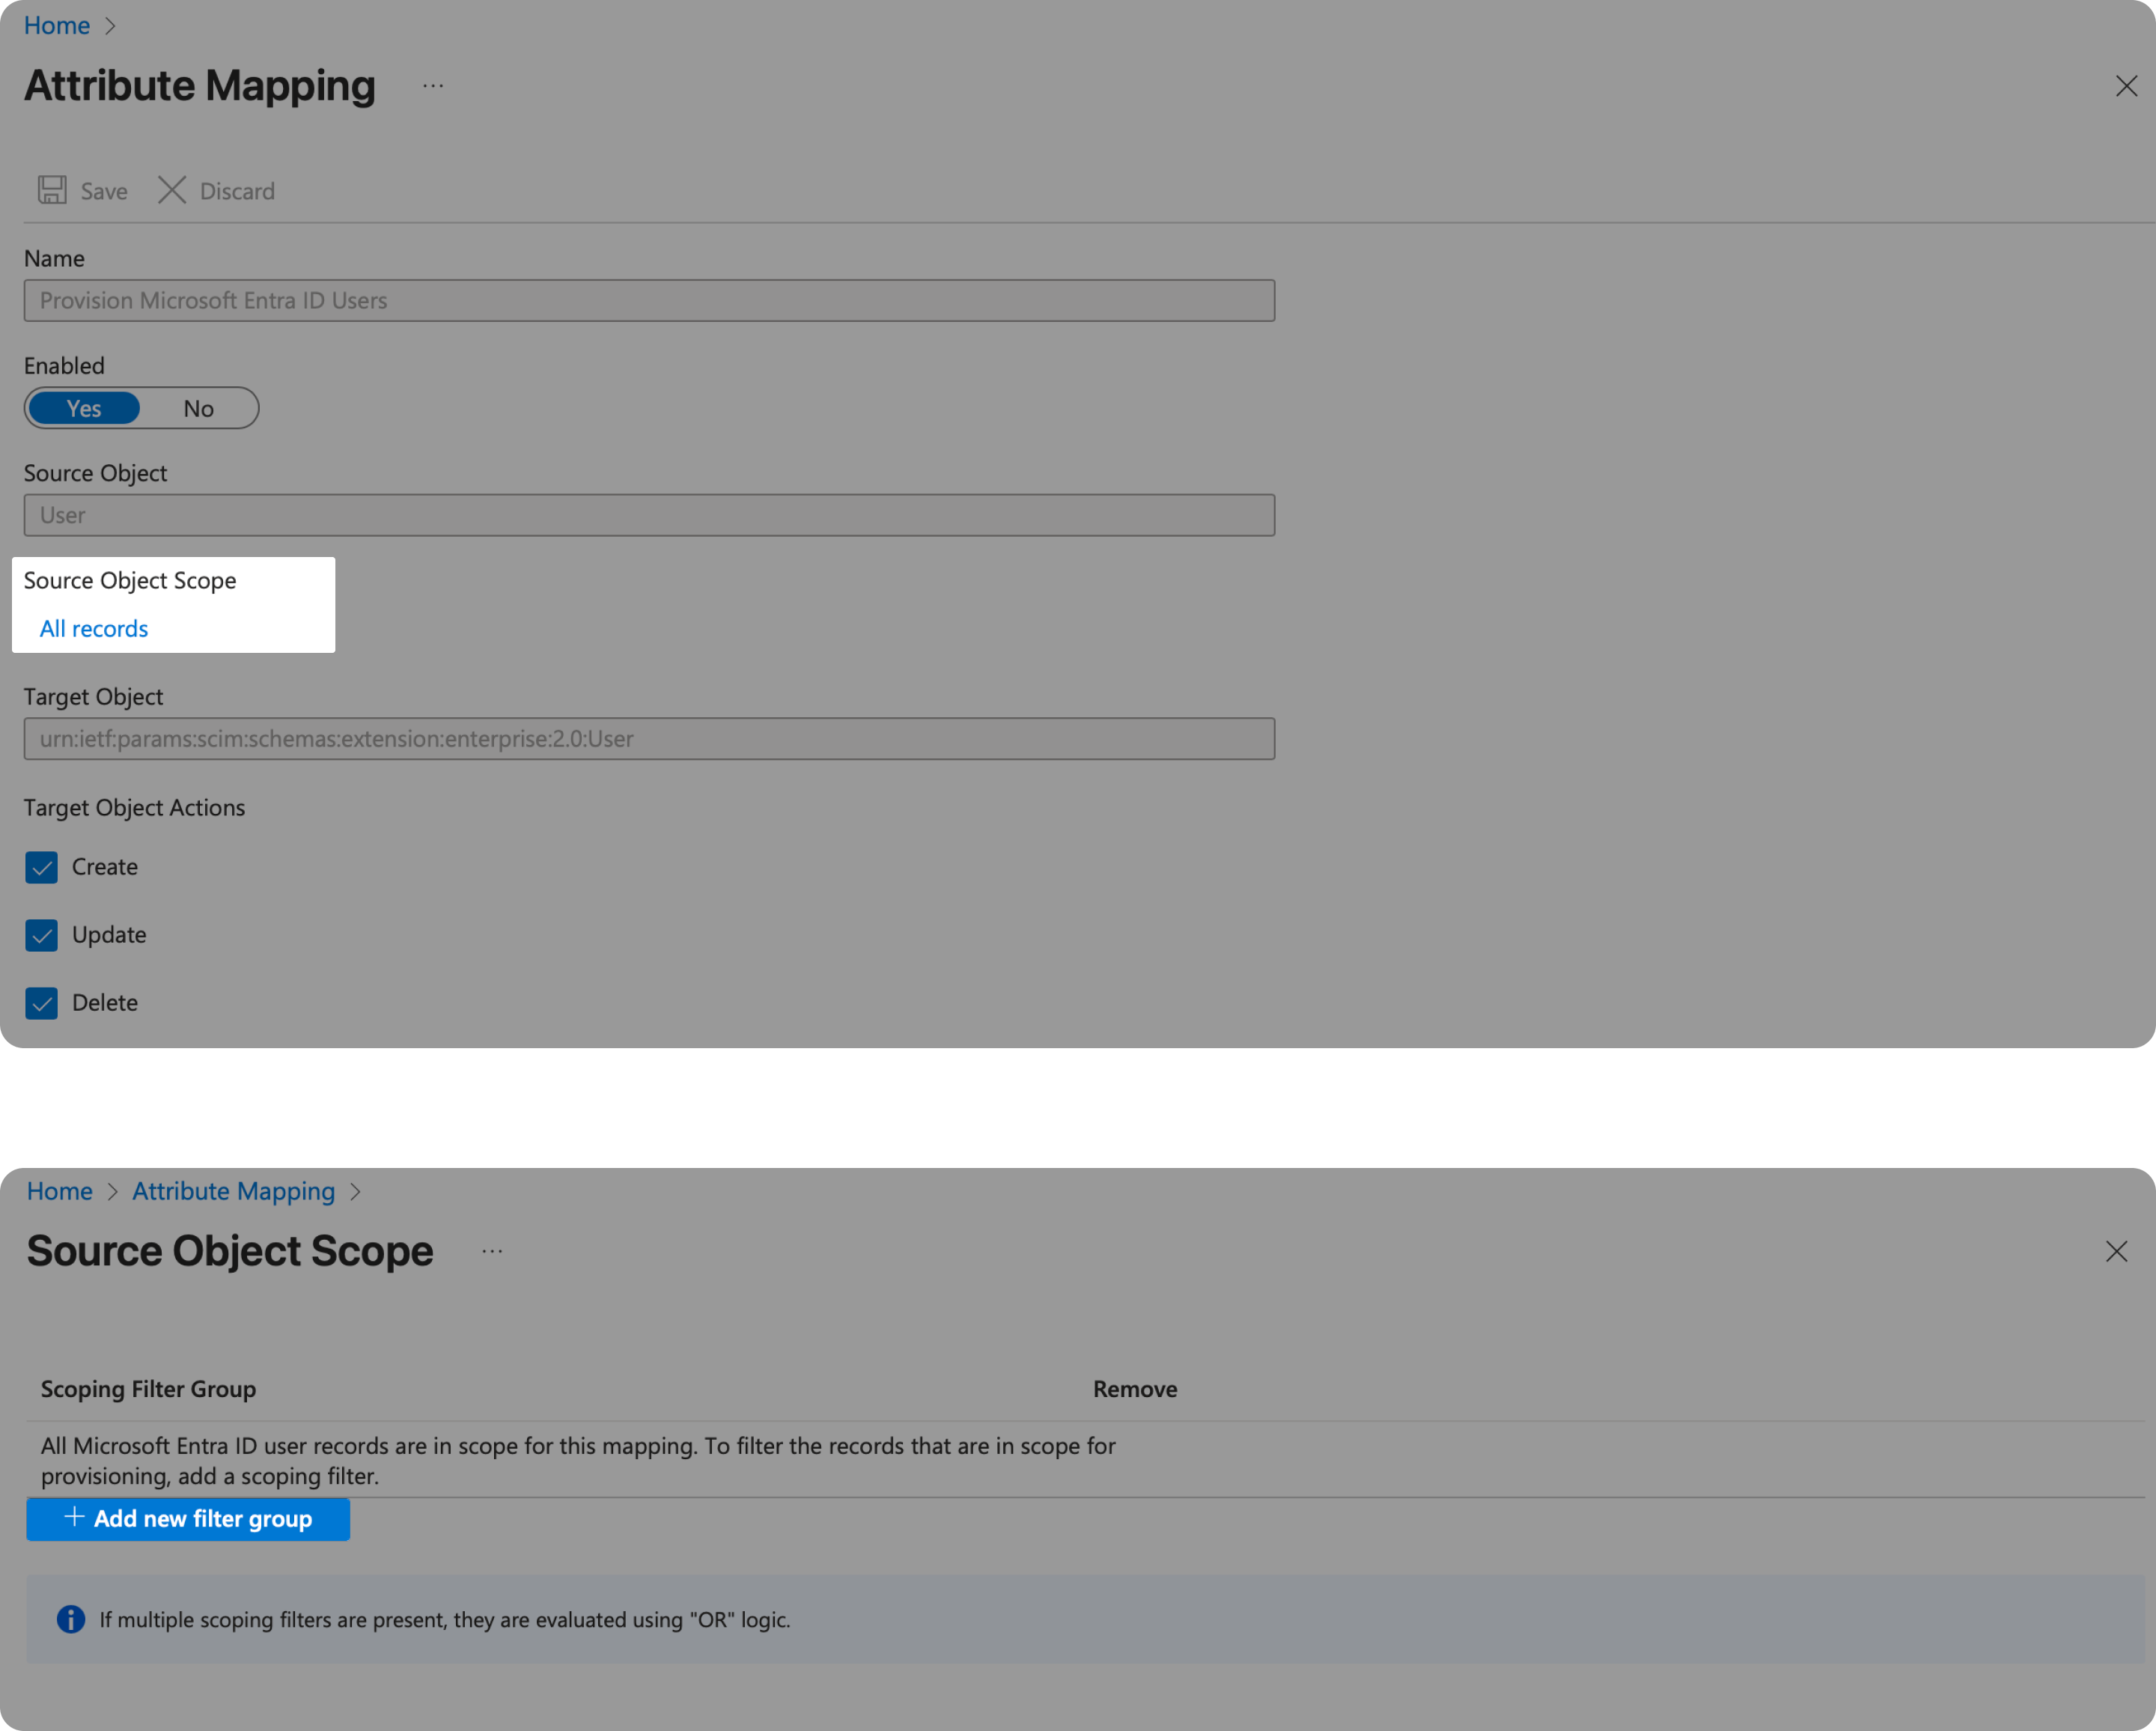
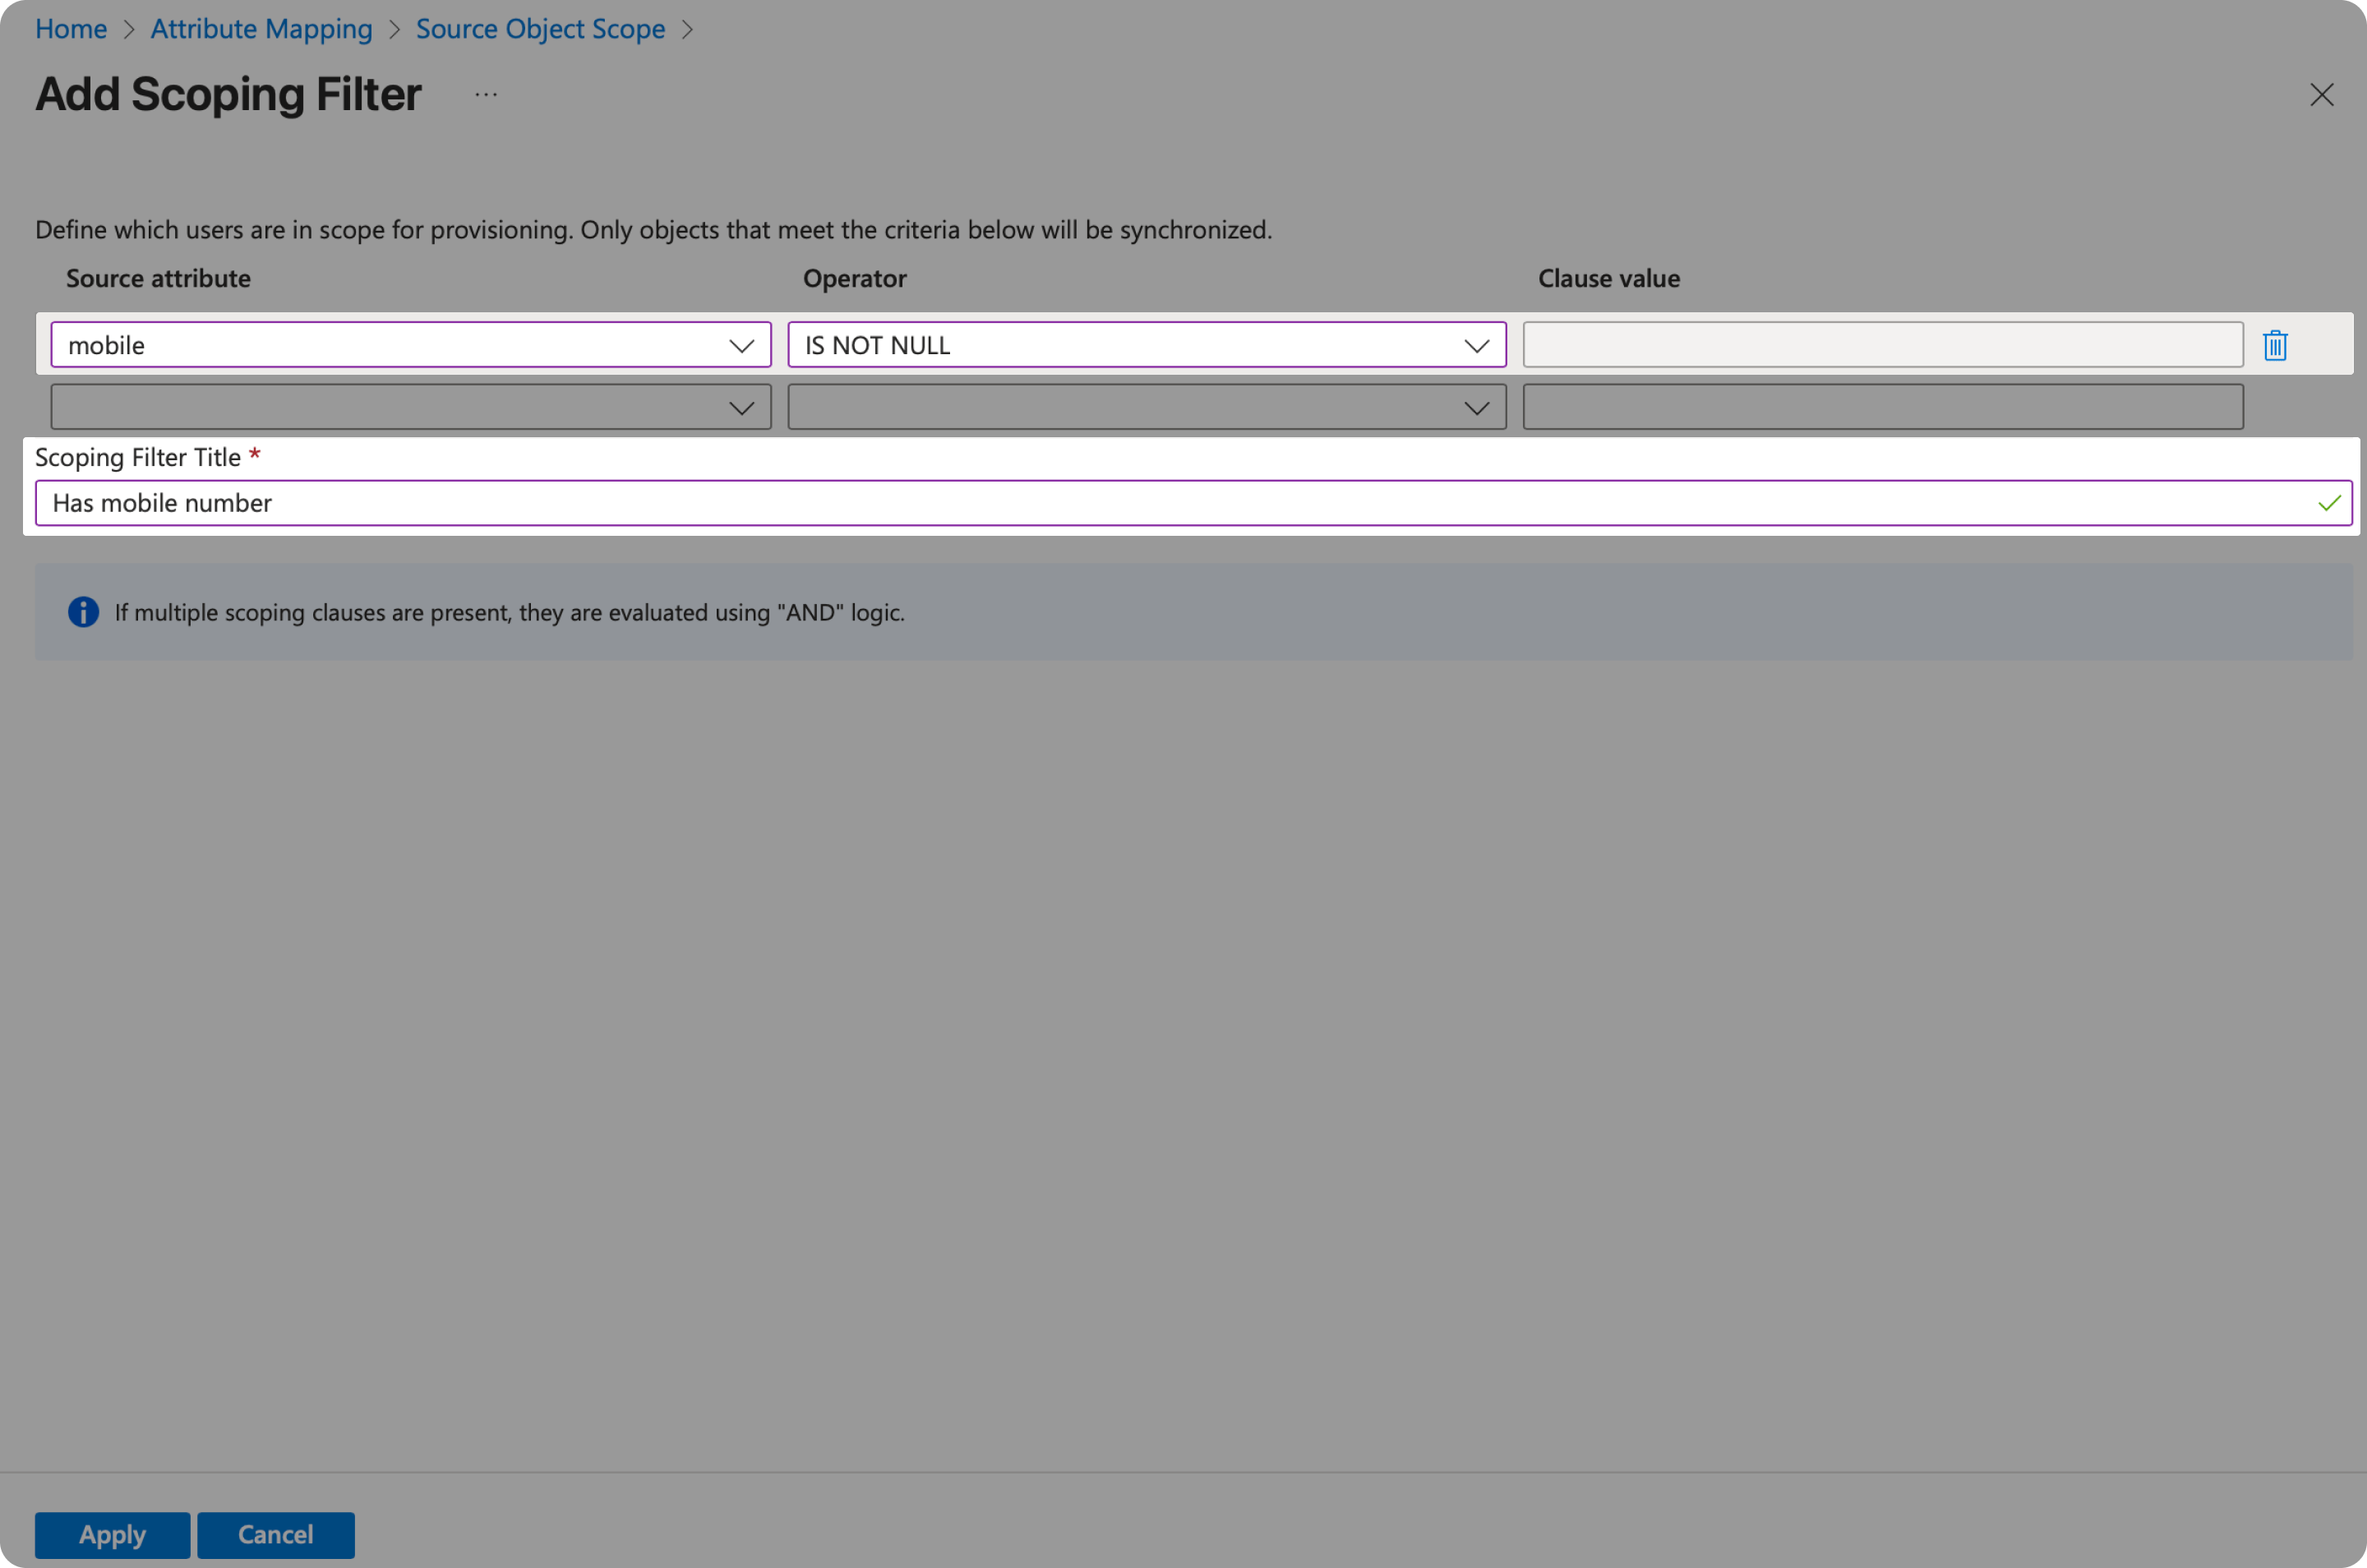
You can also filter the users whose phone number attributes have value. In that case, you may reduce some error reports.
In the users' Attribute Mapping page, set the Source Object Scope and Add new filter group.
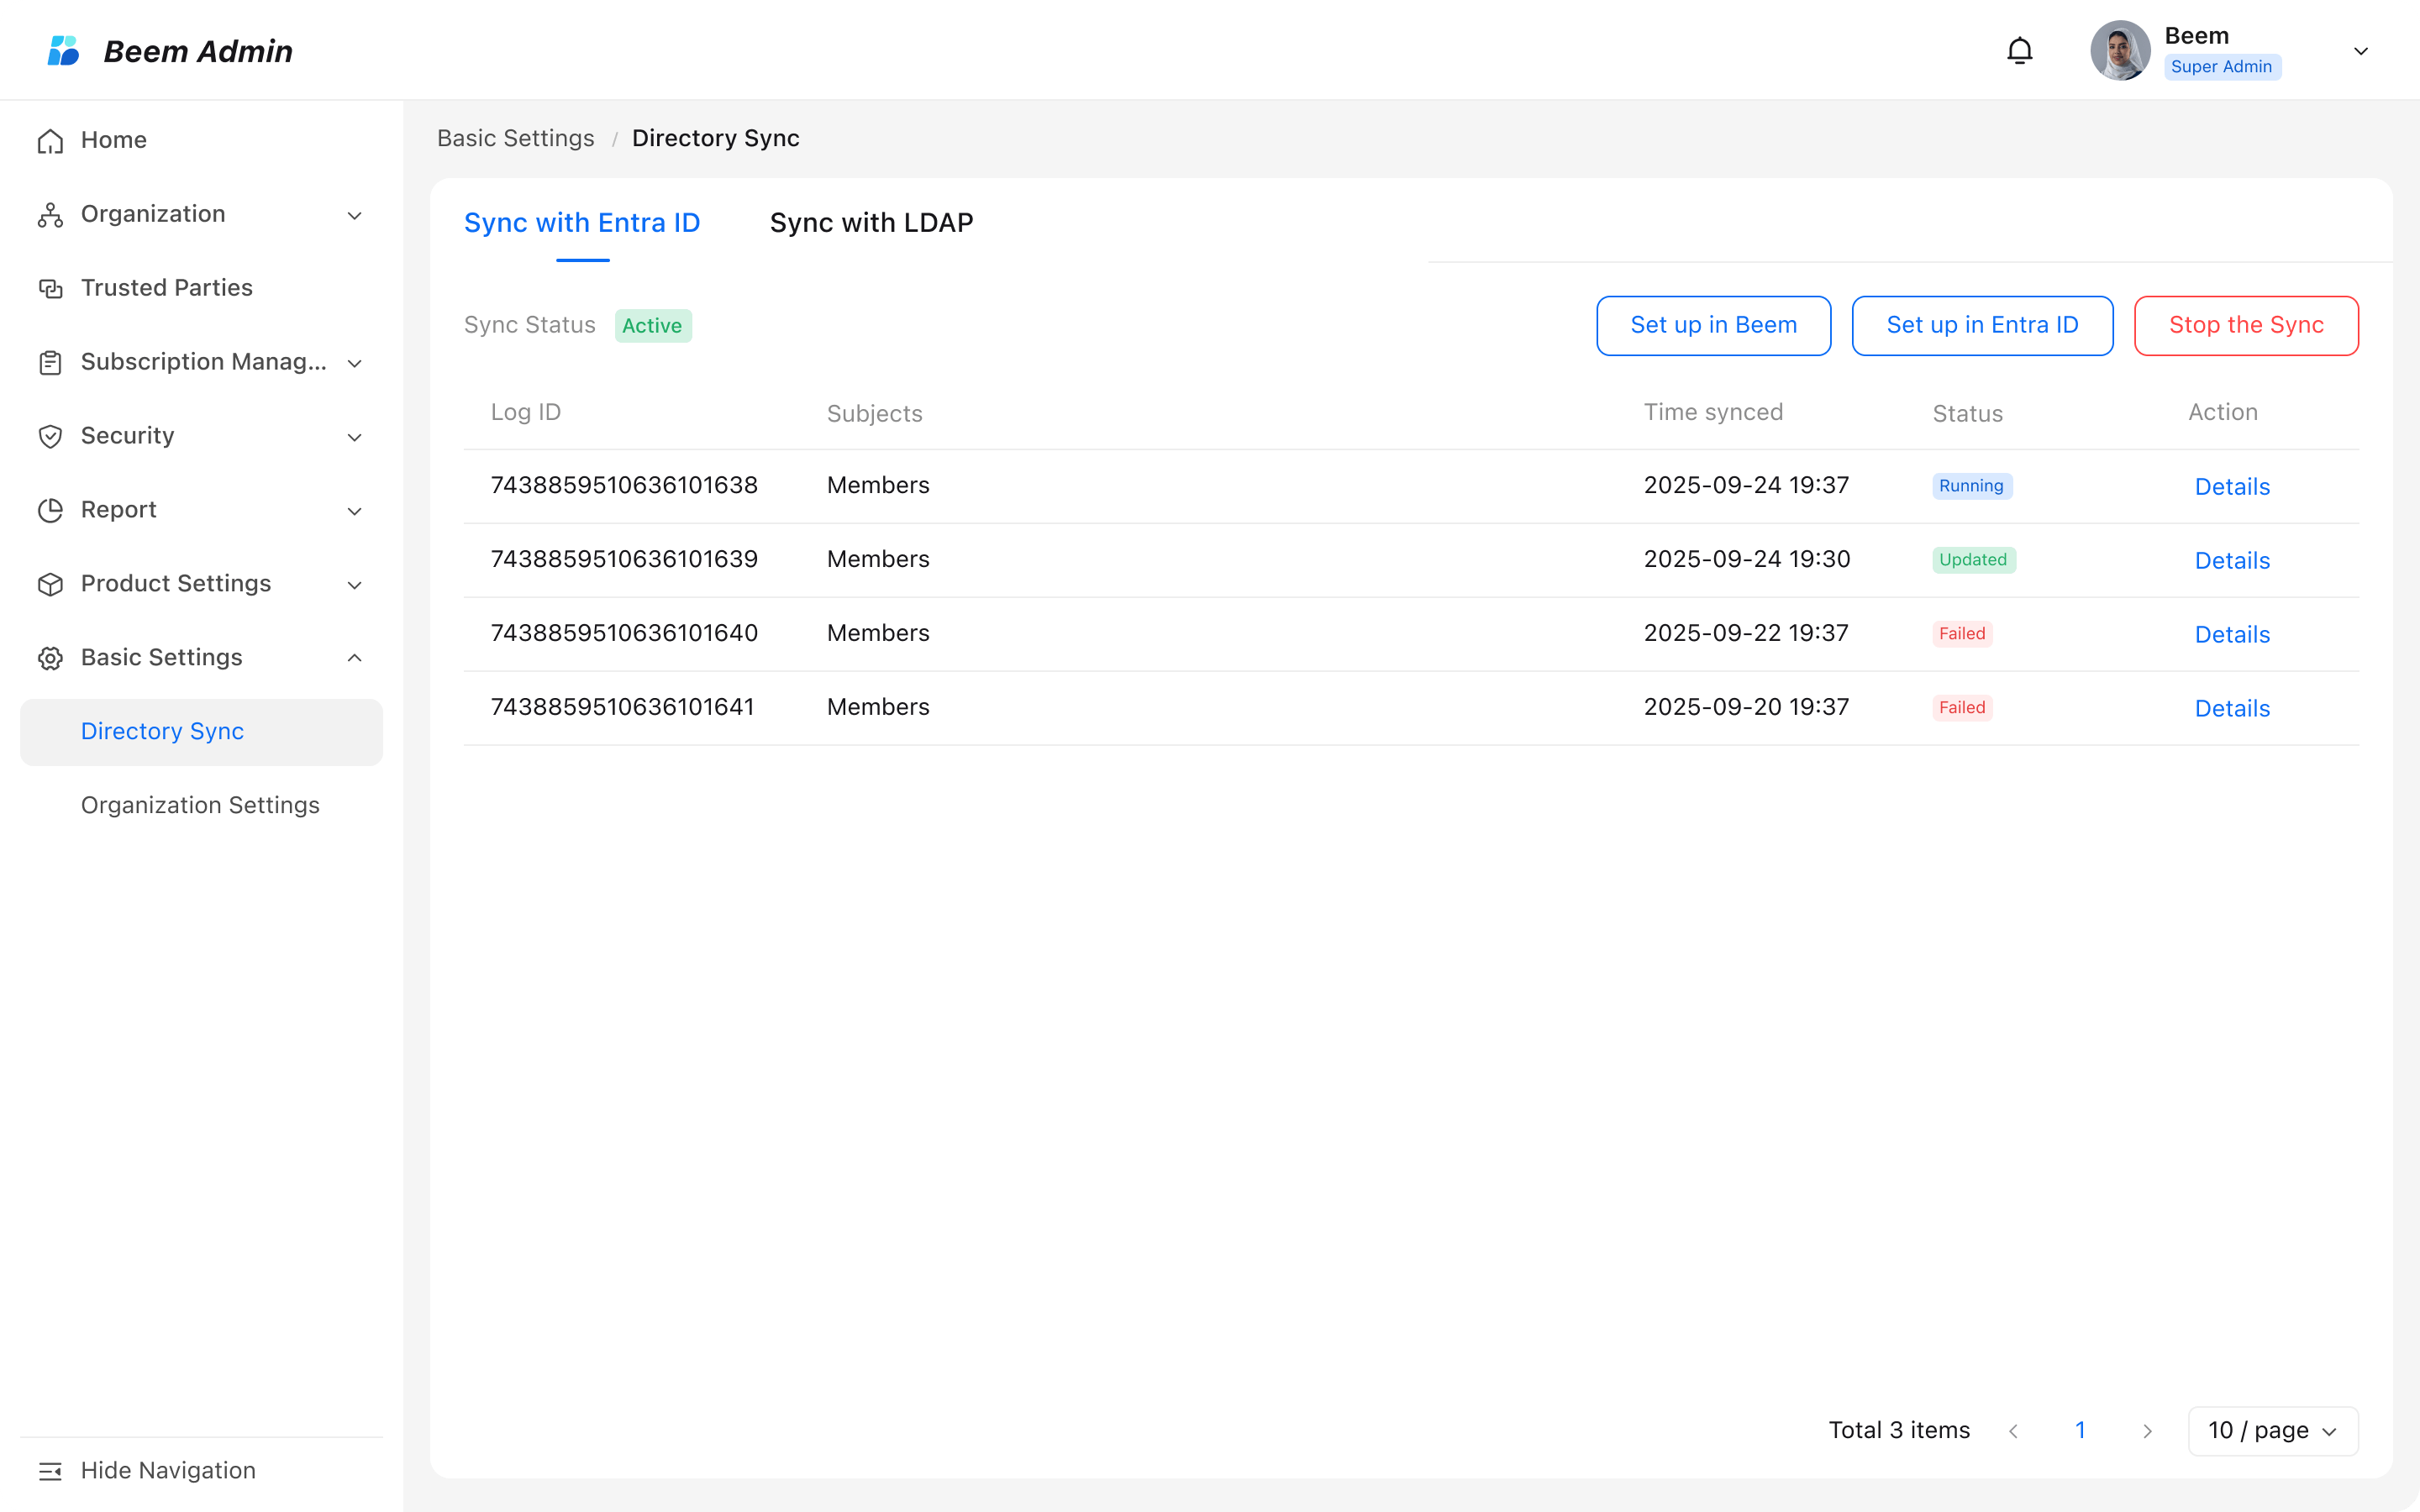
Once you stop the Entra ID Sync, Entra ID will receive a 401 error from Beem and isolate the present provisioning setup. The relevant error message would be of "SystemForCrossDomainIdentityManagementCredentialValidationFailure." Then the Sync would be stopped.
When you reactivate the sync in Beem, please ensure you reactivate the setup in Entra ID and test the connectivity of attributes as well. Once you pass the connectivity test, the setup will be released and you are good to proceed.